VS开发Linux程序(VisualGDB)
from https://blog.csdn.net/woshiyuanlei/article/details/72417087


VisualGDB是在vs上开发Linux程序的工具,利用visual studio强大的功能调试Linux程序真的是很惬意的一件事情。VisualGDB支持Linux的原理是,通过ssh连接到Linux系统上通过ssh给linux下达命令,既然需要Linux系统,而VS又是Windows系统,那么就需要一台虚拟机。对于习惯了Windows下的开发,觉得Linux下的纯命令行开发调试,还是有些不习惯,效率有些低。那么能不能用VS来开发调试Linux程序呢,经过各种查找,找到了VisualGDB这个神奇的插件,通过VS+VisualGDB就可以编译调试Linux程序。
将Crack下的VisualGDB.exe覆盖安装目录下的文件,安装路径默认为C:\Program Files\Sysprogs\VisualGDB!
VisualGDB调试
1. 下载并安装VisualGDB, 安装完成后,在Visual Studio的目录中可以看到Android选项:
2. 配置VisualGDB, 在Android -> Setup SDK/NDK location
主要配置JDK,SDK,NDK,ANT路径
3. 设置要调试的apk包。Android -> Debug a Custom APK file
4 设置完成后,在代码中设置断点,点击Debug, 开始调试
5. 等apk安装完成后,程序会运行到断点出,就可以开始用Visual Studio调试了
VisualGDB 使用教程
一准备工作
1 准备一台Linux机器用来编译程序,我用的是虚拟机安装的CentOS网络设置成桥接模式
(1)安装并开启SSH
(3)关闭防火墙或者开启允许SSH对外访问的网络端口
2下载 VisualGDB 安装没什么好说的一路next就好了,然后打开vs2008会需要配置VisualGDB也是一路next就好了
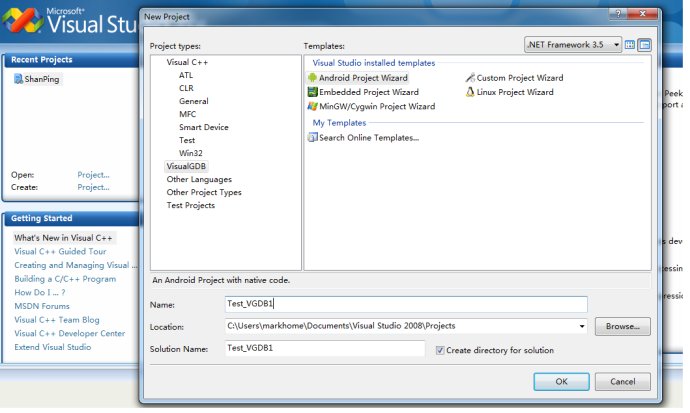
二用vs2008建立一个的linux程序
1 新建工程,然后我们选择【VisualGDB】的【LinuxProject Wizard】
2 选择【Create a newproject】的【Application】
3 建立SSH 链接 选择【Build the projectunder Linux over network】
4选择【Remotecomputer】的 【create a new SSH】输入Linux电脑的ip地址以及用户名密码
5 接下去 next就好了 一个Linux工程就建好了
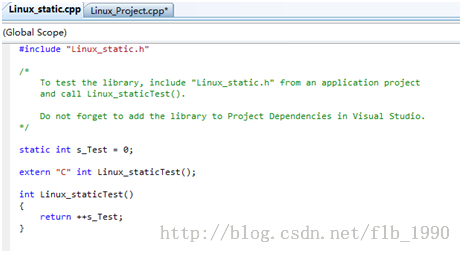
三创建和使用的静态库
1在刚刚的解决方案中新建工程
2 在新建项目时我们选择【Static library】
3 一路next,我就建好了一个静态库文件
4 引用静态库,修改上一个建立的工程
#include <iostream>
#include "../Linux_static/Linux_static.h"
using namespace std;
int main(int argc, char *argv[])
{
char sz[] = "Hello, World!\n"; //Hover mouse over "sz" while debugging to see its contents
cout << "static library method :" << Linux_staticTest() << endl;
cout << sz << endl; //<================= Put a breakpoint here
return 0;
}
5 建立依赖关系
6 编译 运行
四使用第三方的库 以boost库为例
1 在Linux上下载boost 并编译,将boost头文件拷贝到/usr/include 生成的so文件拷贝到/usr/lib 或者 /usr/lib64 (否则会编译能通过但是运行不了)
2 vs2008上新建工程 右键选择【VisualGDBProject Properties】
3 选择Makefile settings
Include directory 第三方库的头文件
Library directory 第三方库的库文件
4 coding
#include <iostream>
#include <boost/thread.hpp>
using namespace std;
void func(){
cout << "this is a thread !" << endl;
}
int main(int argc, char *argv[])
{
boost::thread th1(func);
th1.join();
char sz[] = "Hello, World!\n"; //Hover mouse over "sz" while debugging to see its contents
cout << sz << endl; //<================= Put a breakpoint here
return 0;
}
VisualGDB 初体验:
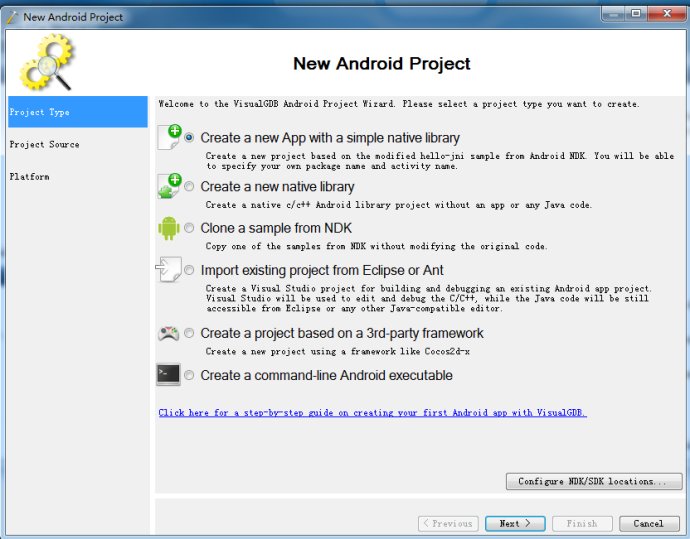
2.1:创建一个带有NativeC库的Android APP。
File -> New -> Project ->VistualGDB -> Android Project Wizard
选择Create a New App with a simple native library.
则会创建一个VS工程,这个工程包含Java文件和NativeC文件. C文件中包含JNI接口.
可以在C/C++ 程序中添加断点调试.
2.2: 使用VisualGDB和Net ADB调试程序:
如果Android设备使用USB线和开发机连接,则使用VisualGDB直接可以调试之。 GDBServer也由VisualGDB从NDK中Push到远端机器上。
但Sam在机顶盒项目中,使用网络ADB而非USB connect ADB. 测试了一下,在adt-bundle-windows-x86_64-xxxx\sdk\platform-tools 目录下,利用adb 连接远端设备。
$adb.exe connect 10.0.0.7:5555
然后使用VisualGDB调试,则它会自动找到远端设备并正常调试。赞一个。
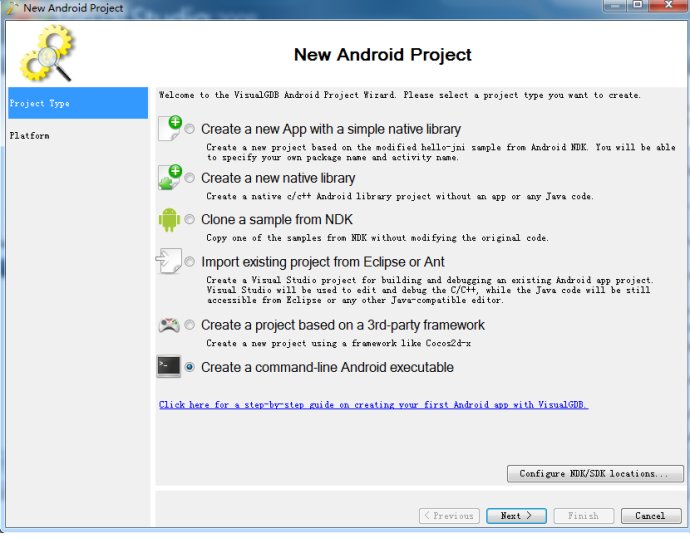
2.3: 创建一个纯NativeC 可执行文件并调试:
选中Create a command-line Android executable.
其实这个就是常作的Android Native C 可执行程序。
可以正常加断点,Debug。
其它还可以Clone NDK的例子程序,打开Eclipse 工程的程序等都可以正常使用。
VisualGDB 进阶:
在实际工作中,工程常是以下几种情况,
NativeC可执行程序依赖于 NativeC 动态或静态库。
现就这两种情况使用VisualGDB调试的情况尝试一下。
3.1:NativeC可执行程序调用NativeC 动态库。
以Sam一个工程: V4L2_Utils为例。它由V4L2_Utils.cpp声成一个动态库。最终被Main.cpp所使用。
3.1.1:尝试一:
创建了一个Native C可执行程序,注意,在Automatic Android.mk updating: 中选择:
The JNI folder contains multiple libraries or conditional stantements. You will have to edit android.mk manually.
也就是说,JNI目录内的文件,不要自动加入Android.mk中编译,如果需要,我们手动加入。
1. 修改Application.mk为Sam常用模式。
# Build both ARMv5TE and ARMv7-A machine code.
APP_PLATFORM = android-8
APP_ABI := armeabi-v7a
#APP_ABI := $(ARM_ARCH)
#Sam modify it to release
#APP_OPTIM := release
APP_OPTIM := debug
#APP_OPTIM = $(MY_OPTIM)
APP_CPPFLAGS += -fexceptions
APP_CPPFLAGS += -frtti
#sam modify it from gnustl_static to gnustl_shared
#APP_STL := gnustl_static
#APP_STL := gnustl_shared
APP_STL := gnustl_shared
#APP_CPPFLAGS += -fno-rtti
#
APP_CPPFLAGS += -Dlinux -fsigned-char
APP_CFLAGS += -fsigned-char
2. 把V4L2_utils.cpp, V4L2_Utils.h放到jni目录中。但不加入到工程中(否则会自动加入编译)
3. 修改Android.mk
# Generated by VisualGDB
LOCAL_PATH := $(call my-dir)
include $(CLEAR_VARS)
LOCAL_MODULE := TestNDK
LOCAL_ARM_MODE := arm
#VisualGDBAndroid: AutoUpdateSourcesInNextLine
LOCAL_SRC_FILES := TestNDK.cpp
LOCAL_C_INCLUDES :=
LOCAL_STATIC_LIBRARIES :=
LOCAL_SHARED_LIBRARIES :=
LOCAL_LDLIBS :=
LOCAL_CFLAGS :=
LOCAL_CPPFLAGS :=
LOCAL_LDFLAGS :=
COMMON_SRC_FILES := $(LOCAL_SRC_FILES)
LOCAL_STATIC_LIBRARIES := Camera_V4L2
include $(BUILD_EXECUTABLE)
include $(CLEAR_VARS)
LOCAL_ARM_MODE := arm
LOCAL_MODULE := Camera_V4L2
LOCAL_SRC_FILES := v4l2_util.cpp
LOCAL_CXXFLAGS := -D_GLIBCXX_USE_WCHAR_T -I./
LOCAL_LDLIBS := -llog
include $(BUILD_SHARED_LIBRARY)
编译,果然生成libCamera_V4L2.so , 和TestNDK. 但这个办法显然不是好办法。
因为调试时,只能调试主程序:TestNDK.cpp。 而无法调试动态库。且debug时,VisualGDB甚至不会自动把动态库push到开发板上。
3.1.2:尝试二:
建立两个工程,其中一个工程是Main.cpp生成可执行程序。
另一个工程是V4L2_Utils.cpp生成 动态库。
利用Vs工程的依赖方法让第一个工程依赖于第二个。
编译,一切正常。但可悲的是,visualGDB 还是不会自动把动态库push上去。 且它竟然没法export LD_LIBRARY_PATH=$LD_LIBRARY_PATH:./
导致无法调试。
这两个尝试其实都是失败的。难道VisualGDB只适合调试JNI下的NativeC库?
尝试三:
干脆把V4L2_Utils.cpp加入工程一。则不再生成动态库,直接合并入可执行文件中。这样则可以调试。
但这显然不是个好办法。无法满足真正的项目调试。


"""You brought really good points there. I just checked for more information on problem and found that most people agree with your opinion on this Website.""
回覆刪除Samkey Crack
Samkey
free samkey account
samkey credits"