RCA output


from https://eecs.blog/arduino-rca-video-output-to-tv/


Arduino RCA Video Output to TV

TV RCA Output with Arduino

About

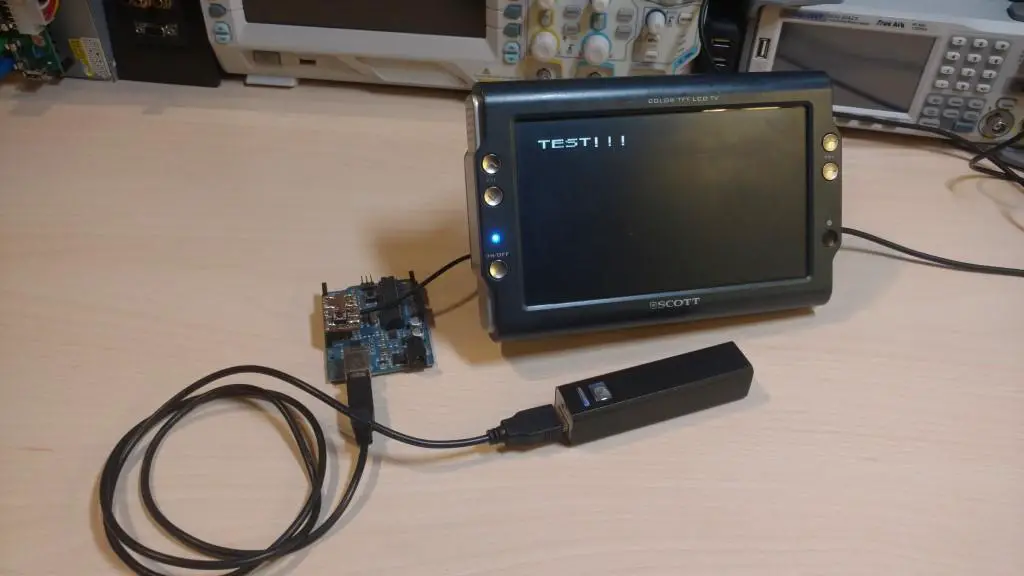
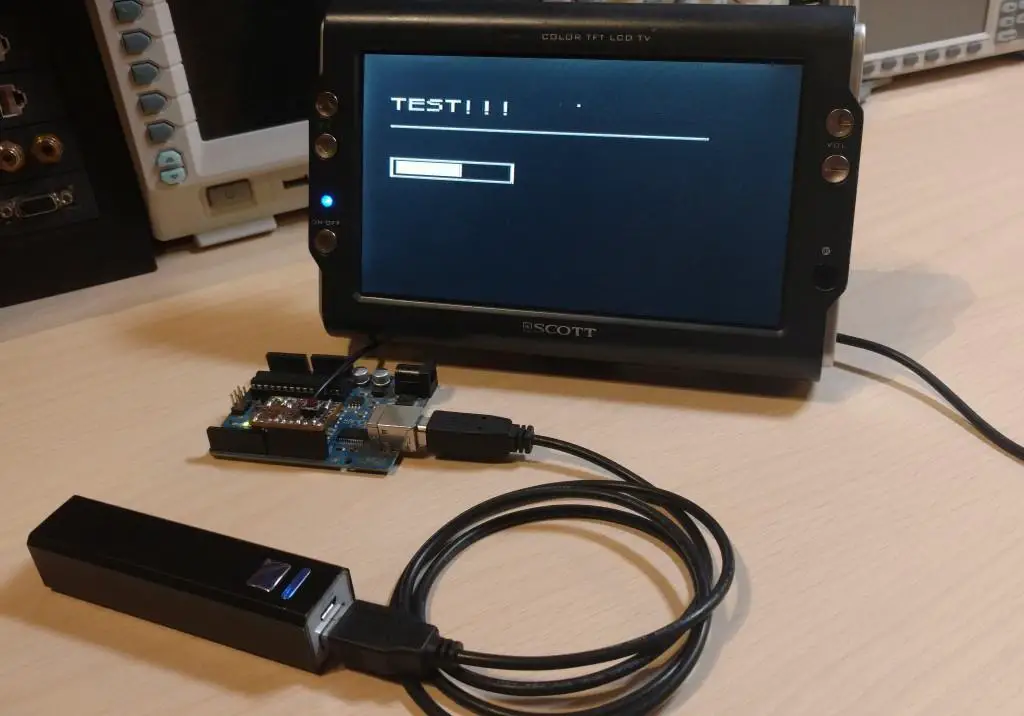
In this tutorial, you will learn how to output video from an Arduino and display it on a TV. We will make a board/cable adapter that will connect the Arduino to the TV through the RCA input. Then we’ll look at some of the functions available to us in the TVout library and use them to output something to the screen.

If you would like to know how to output an image to the TV see this post.

Hardware used:

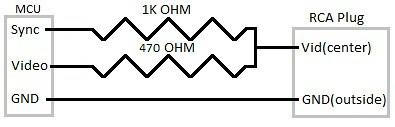
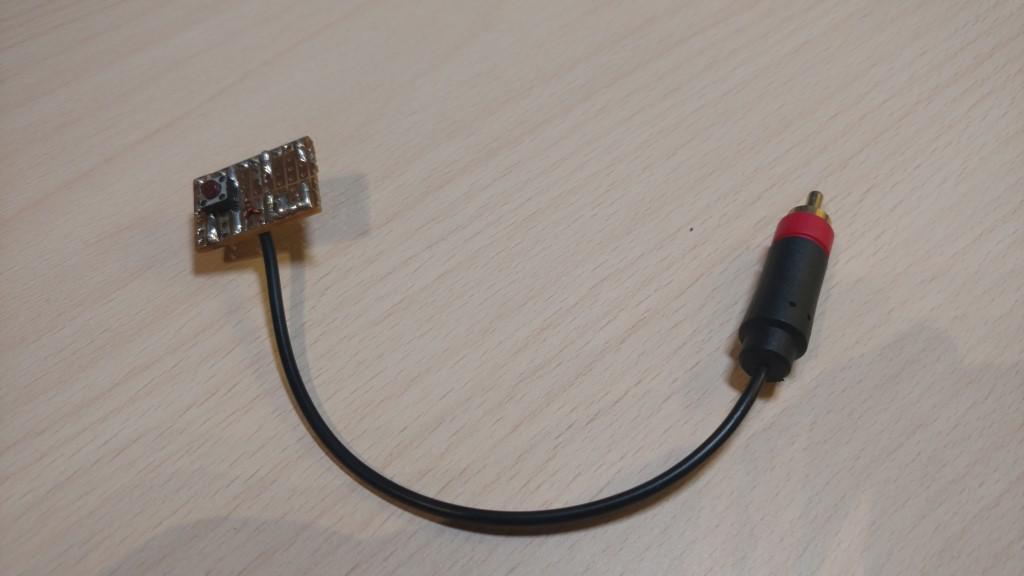
Hardware Connections

arduino rca output connection
source: https://playground.arduino.cc/Main/TVout/
arduino RCA video out board 2
According to the schematic, I made a board that easily plugs into the Arduino. I also added a button between ground and pin 11 to be used as an input(see the second code example).

Software

You first have to install the TVout library. You can do that by using the Arduino library manager.  If you don’t exactly know how to install a library see the first part of this tutorial

For the first example let’s do something simple and just output some text to the screen.

#include <TVout.h>
#include <fontALL.h>
TVout TV;
void setup()
{
//Setup display. (PAL/NTSC, resolution width, resolution height)
TV.begin(PAL,120,96);
//Select font.
TV.select_font(font6x8);
}
void loop()
{
//Clear screen at the beginning of the loop.
TV.clear_screen();
//Set curosr position. (x,y)
TV.set_cursor(0, 10);
//Print text.
TV.println("TEST!!!");
TV.delay(60);
}

Output:

TV RCA Output with Arduino

That was the bare minimum code you need to display something. Now let’s take a look at a few examples of other useful features.

#include <TVout.h>
#include <fontALL.h>
TVout TV;
int bar = 0;
int barMax = 36;
int buttonPin = 11;
void setup()
{
//Setup display.
TV.begin(PAL,120,96);
//Select font.
TV.select_font(font6x8);
//Set pin mode for button.
pinMode(buttonPin, INPUT_PULLUP);
}
void loop()
{
//Clear screen at the begining of the loop.
TV.clear_screen();
//Set cursor position. (x,y)
TV.set_cursor(0, 10);
//Print text.
TV.println("TEST!!!");
//Set individual pixel. (x,y, color) // 0 - black, 1 - white
TV.set_pixel(60,10,1);
//Draw line. (x1,y1,x2,y2,color) // 0 - black, 1 - white
TV.draw_line(0,25,100,25,1);
//Increment progress bar. (I haven't debounced the button but in this case that makes no differnce.)
if(digitalRead(buttonPin) == LOW && bar <= barMax){
bar++;
}else if(bar > barMax){
bar = 0;
}
//Using rectangles to make a progress bar.
//draw_rect(x,y,w,h,color,fill) // 0 - black, 1 - white
TV.draw_rect(0,43,40,10,1,0);
TV.draw_rect(2,45,bar,6,1,1);
TV.delay(60);
}

Output:

TV RCA Output with Arduino example 2


留言

熱門文章